Brackets Emmet Zencoding short-cuts
by Adisak 31 สิงหาคม 2019
html:5
Alias of !!!+doc[lang=${lang}]
<!DOCTYPE html>
<html lang="en">
<head>
<meta charset="UTF-8" />
<title>Document</title>
</head>
<body>
</body>
</html>
form:post
<form action="" method="post"></form>
inp
<input type="text" name="" id="" />
table+
Alias of table>tr>td
<table>
<tr>
<td></td>
</tr>
</table>
select+
Alias of select>option
<select name="" id="">
<option value=""></option>
</select>
c
<!-- ${child} -->
img
<img src="" alt="" />
div.columns>div.column*5
<div class="columns">
<div class="column"></div>
<div class="column"></div>
<div class="column"></div>
<div class="column"></div>
<div class="column"></div>
</div>
Brackets editor short-cut
Crtl+D = Copy Line
Crtl+shift+D = Delete Line
คอมพิวเตอร์และอินเตอร์เน็ต,บรรยายวิชาการ,วิจัย,ศึกษากุรอาน,E-Book
วันศุกร์ที่ 30 สิงหาคม พ.ศ. 2562
วันพุธที่ 28 สิงหาคม พ.ศ. 2562
วันอาทิตย์ที่ 25 สิงหาคม พ.ศ. 2562
CronJob คืออะไร วิธีตั้งเวลาให้ PHP ทำงาน
CronJob คืออะไร วิธีตั้งเวลาให้ PHP ทำงาน
Cronjob เป็นคุณสมบัติพื้นฐานของระบบปฏิบัติการ Linux โดยลีนุกซ์นั้น จัดว่าเป็นระบบปฏิบัติการยูนิกซ์ประเภทหนึ่งด้วยเช่นกัน
เราสามารถใช้คุณสมบัติ CronJob นี้ เพื่อกำหนดช่วงเวลาการทำงานของภาษา php หรือ script ใด ๆ โดยอัตโนมัติได้
โดยปกติแล้วการที่ภาษาที่เป็น Server Side ต่าง ๆ จะสามารถเริ่มทำงานได้ จะต้องอากศัย User ในการเริ่มทำงาน
คือจะทำการเปิดเบราว์เซอร์หน้าเว็บไซต์นั้น ๆ ก่อน ถึงจะสามารถทำงานคำสั่งต่าง ๆ ภายใน script file นั้น ๆ ได้
แต่เราสามาถใช้ความสามารถของ CronJob ในการสั่งให้ไฟล์นั้น ๆ ทำงานได้ โดยไม่ต้องอาศัยการเปิดหน้าเว็บไซต์ของเลย
วิธีตั้งค่าใช้งาน CronJob
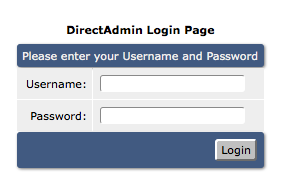
1. เข้าสู่ระบบ DirectAdmin เลือกโดเมนที่ต้องการใช้งาน run script php

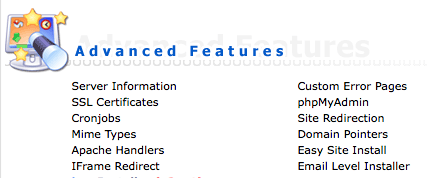
2. ไปที่ส่วน Advanced Features มองหาหัวข้อ CronJob

3. หลังจากคลิกเข้ามาเจอช่องให้ใส่ ช่วงเวลาและวัน ที่จะให้ run script โดยอธิบาย input ต่าง ๆ ได้ดังนี้

- Minute ใส่ตัวเลขนาที 0-59
- Hour ใส่ตัวเลขชั่วโมง 0-23
- Day of Month ใส่ตัวเลขวันที่ 1-31
- Month ใส่ตัวเลขเดือน 0-12
- Day of Week ใส่ตัวเลขวัน 1-7 หรือ Sun-Sat ( ตัวเลข 0 หรือ 7 มีค่าเท่ากันคือวันอาทิตย์ )
- Command คือ Path ของ php script ที่เราต้องการให้ทำงาน
- Prevent Email ถ้าเราไม่ต้องการให้ส่งข้อมูลทุกครั้งที่ CronJob ทำงานให้กดที่ปุ่มนี้
ตัวอย่างการกำหนดเวลา
เครื่องหมายดอกจัน ( * ) หมายถึงทำงาน ทุกนาที ทุกชั่วโมง ทุกวัน ทุกเดือน คือทำงานทั้งหมด
- กำหนดให้ทำงานทุก 5 นาที ให้กรอกข้อมูลดังนี้1*/5 * * * *
- กำหนดให้ทำงานทุกเที่ยงคืนของทุกวัน ให้กรอกข้อมูลดังนี้10 0 * * *
- กำหนดให้ทำงานทุก 6 โมงเข้าของทุกวันศุกร์10 6 * * 5
ทดสอบการทำงาน
สำหรับการทดสอบการทำงานของ CronJob ให้ลองสร้างไฟล์ .php และเขียนคำสั่งส่งอีเมลไปที่อีเมลของเรา
ทุก ๆ 3 นาทีและตรวจดูว่ามีอีเมลเข้าที่มีกล่องข้อความหรืออีเมลขยะหรือไม่ ถ้าการตั้งค่าต่าง ๆ ถูกต้องเราก็จะได้รับอีเมล
ทุก ๆ 3 นาทีและตรวจดูว่ามีอีเมลเข้าที่มีกล่องข้อความหรืออีเมลขยะหรือไม่ ถ้าการตั้งค่าต่าง ๆ ถูกต้องเราก็จะได้รับอีเมล
1
2
3
|
<?php
mail("youremail@gmail.com","Hello CronJob","This is message from CronJob System.");
?>
|
ตัวอย่างกำหนด Command Path
สำหรับการกำหนด Path ของ php script หรือภาษาอื่น ๆ ให้เรากำหนดเป็นแบบ Absolute Hosting Path ตัวอย่างเช่น
1
|
/home/username/domains/domain.com/public_html/jobs.php
|
Command ด้านบนเป็นเพียงตัวอย่าง สำหรับ Command Path อาจจะมีความแตกต่างกันไปตามแต่ละผู้ให้บริการซึ่งท่าน
สามารถสอบถามหรือหาตัวอย่างซึ่งอยู่ในหน้าการใช้งาน Cronjob ได้ด้วยตัวเอง
สำหรับการใช้งาน cronjob ร่วมกับ php framework ถ้าไม่สามารถใช้งานได้กับ command ด้านบนให้เปลี่ยนไปใช้ wget แทน ตัวอย่างคำสั่ง wget command เมื่อใช้กับ codeigniter framework
สามารถสอบถามหรือหาตัวอย่างซึ่งอยู่ในหน้าการใช้งาน Cronjob ได้ด้วยตัวเอง
สำหรับการใช้งาน cronjob ร่วมกับ php framework ถ้าไม่สามารถใช้งานได้กับ command ด้านบนให้เปลี่ยนไปใช้ wget แทน ตัวอย่างคำสั่ง wget command เมื่อใช้กับ codeigniter framework
1
|
wget yourdomain.com/path/to/project/index.php/controller/method
|
Using Knockout.js with PHP: Best Practices
Using Knockout.js with PHP: Best Practices
by Roman Kagan|Published
I recently had a project that made me temporarily shift from my more native c#/asp.net environment and use php on the backend instead. As by more and more asp.net developers these days I have become accustomed to doing just about everything in the front end with the JavaScript library Knockout. Of course knockout.js is completely compatible with php being that it is on the front end while php is on the back end, but in combining php with knockout there are a few things that I have found make the match just a bit smoother.
Use json_encode() to pass PHP arrays to knockout
<?php
function getOrders() {
include_once 'mysql_connect.php';
$email = $_SESSION['Email'];

$query = sprintf("SELECT * FROM `Order` WHERE `Email` = '%s' order by id desc",
  mysqli_real_escape_string($con, $email));

$result = mysqli_query($con, $query);
$data = array();
while($row = mysqli_fetch_array($result, MYSQLI_ASSOC)){
  $data[] = $row;
  }

mysqli_close($con);
return json_encode($data);//json_encode() is the key
}
?>
Then on on the front-end:
$(document).ready(function () {
    //Pass JSON encoded data directly into javascript variable
    var data = <?php getOrders(); ?> ;
    var vm = new ViewModel(data);
    ko.applyBindings(vm);
});

function ViewModel (data){
 self = this;
 self.Orders = ko.mapping.fromJS(data);
}
Use ko.toJS() to send data from your ViewModel to PHP
function ViewModel (){
    self = this;
    self.Order = {
  Email:ko.observable(),
  FirstName : ko.observable(),
  LastName : ko.observable(),
  URL : ko.observable(),
  Comments : ko.observable()
 };
    self.CreateOrder = function() {
        //Here is where you convert the data to something php can swallow
        var data = ko.toJS({"Data":order});
        $.ajax({
            url: "CreateOrder.php",
            type: 'post',
            data: data,
            success: function (result) {
                console.log(result);
            }
        });
    };
}
And then on the back end:
<?php
include_once 'mysql_connect.php';
//recieve raw data into php variable
$data = $_POST['Data'];

//extract each field from raw data
$email = $data['Email'];
$firstName = $data['FirstName'];
$lastName = $data['LastName'];
$comments = $data['Comments'];
...
?>
CR : http://www.romankagan.com/?p=186
KnockoutJS
KnockoutJS is widely used for Single Page Applications - A website created with the ability to retrieve all necessary data dynamically with a single page load reducing server round trips.
<!DOCTYPE html>
   <head>
      <title>KnockoutJS Observable Example</title>
      <script src = "https://ajax.aspnetcdn.com/ajax/knockout/knockout-3.1.0.js"
         type = "text/javascript"></script>
   </head>

   <body>
      <!-- This is called "view" of HTML markup that defines the appearance of UI -->
      <p>Enter your name: <input data-bind = "value: yourName" /></p>
      <p>Hi <strong data-bind = "text: yourName"></strong> Good Morning!!!</p>

      <script>
         //This is called "viewmodel". This javascript section defines the data and behavior of UI
         function AppViewModel() {
            this.yourName = ko.observable("");
         }

         // Activates knockout.js
         ko.applyBindings(new AppViewModel());
      </script>
   </body>
</html>
output
วันเสาร์ที่ 24 สิงหาคม พ.ศ. 2562
PWA without any 3rd party content
After searching the web for a simple PWA tutorial, everything I found was either too complicated or required one 3rd party. But,I wrote a simple tutorial myself that doesn’t require any 3rd party content: The classic “Hello World” app, PWA style.
The Setup
Create a directory for the app and add js, css, and images subdirectories. It should look like this when you’re finished:
/Hello-PWA # Project Folder
/css # Stylesheets
/js # Javascript
/images # Image files.
Writing Codes (most minimum importent 3 files):
The Setup
Create a directory for the app and add js, css, and images subdirectories. It should look like this when you’re finished:
/Hello-PWA # Project Folder
/css # Stylesheets
/js # Javascript
/images # Image files.
Writing Codes (most minimum importent 3 files):
1.index.html on root
2.main.js on js folder
3.Service workers sw.js on root
Remark : Testing the App
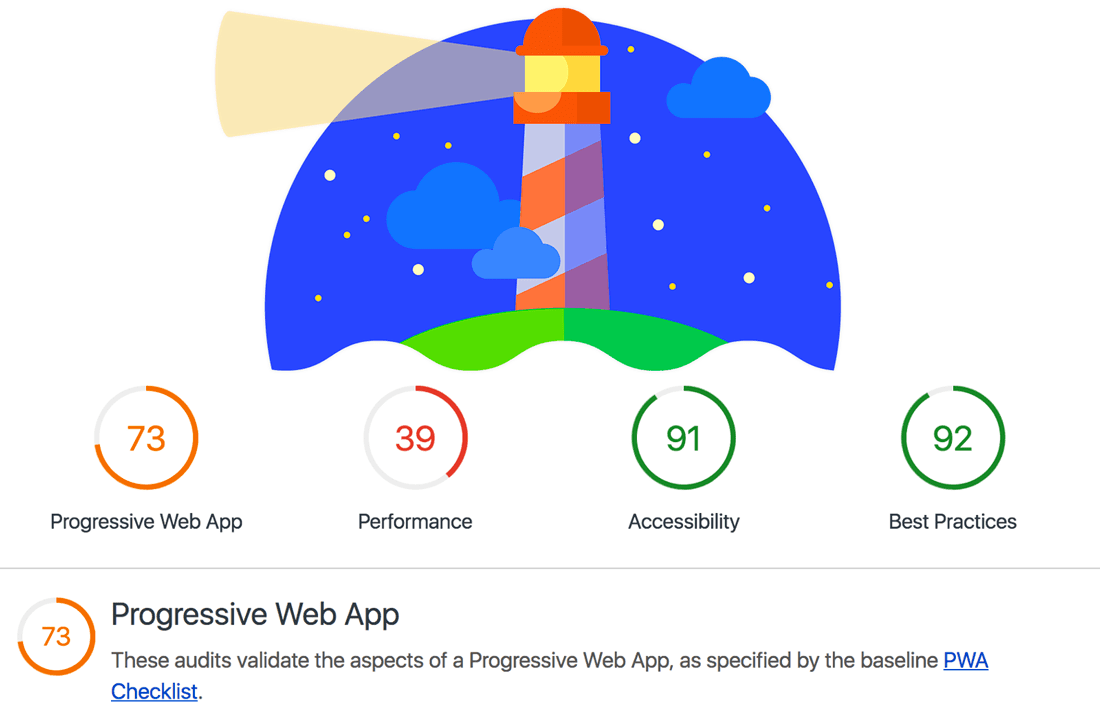
Now that we’ve got something in the browser, we’ll use Google’s Lighthouseto test the app and see how well it conforms to PWA standards. Press F12 to open the developer panel in Chrome and click on the audits tab to open Lighthouse.
วันอังคารที่ 13 สิงหาคม พ.ศ. 2562
สมัครสมาชิก:
ความคิดเห็น (Atom)


